ZAP Tutorial - How to Set Up ZAP to Work with Browser
This blog is written in the form of a tutorial on how to intercept a browser’s traffic using the OWASP Zed Attack Proxy (ZAP).
The topics covered are:
- Overview of ZAP
- Configure ZAP as proxy
- Add a ZAP Root CA to the list of certificates in browser
Prerequisite tasks: Download and install ZAP. In this tutorial I will be using Kali which already has OWASP ZAP installed on it.
Overview of ZAP
OWASP ZAP is an open-source cross-platform tool that is developed by the Open Web Application Security Project (OWASP). It is used as a penetration testing tool to find vulnerabilities in web applications. ZAP contains several important features that will come up during this tutorial and future tutorials. The main features include:
- Intercepting Proxy: ZAP sits as a proxy between the browser and the application and therefore captures all the requests and responses sent.
- Active Scanner: The active scanner attempts to find vulnerabilities by performing attacks on the application. This can potentially cause significant harm to the application and therefore should ONLY be used on web applications you have permission to test.
- Passive Scanner: Unlike the active scanner, the passive scanner just examines the requests and responses and detects problems based on the passive scan rules specified. ZAP will run these passive scan rules by default against all URLs that are proxied or visited through the spider. Since the passive scanner does not perform any attacks it is safe to use on any site.
- Spider: The spider is used to map and crawl the application.
This tutorial will only focus on the first feature. As an intercepting proxy, ZAP will sit in between the browser and the web application as shown in the figure below.
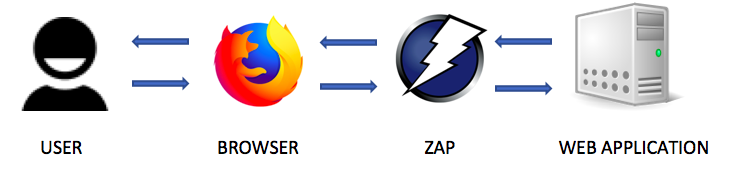
Any request sent by the browser will first be intercepted by zap and then sent to the web application. Similarly, any response sent by the web application will be intercepted by zap and then sent to the browser. When a request is intercepted, ZAP can modify the request to exploit an existing vulnerability in the web application.
Configure ZAP as proxy
In order for ZAP to work as an intercepting proxy, you need to configure the network settings of your browser. By default, ZAP is configured to listen on port 8080 on localhost. This can be seen in the Options window (Tools > Options > Local Proxies).

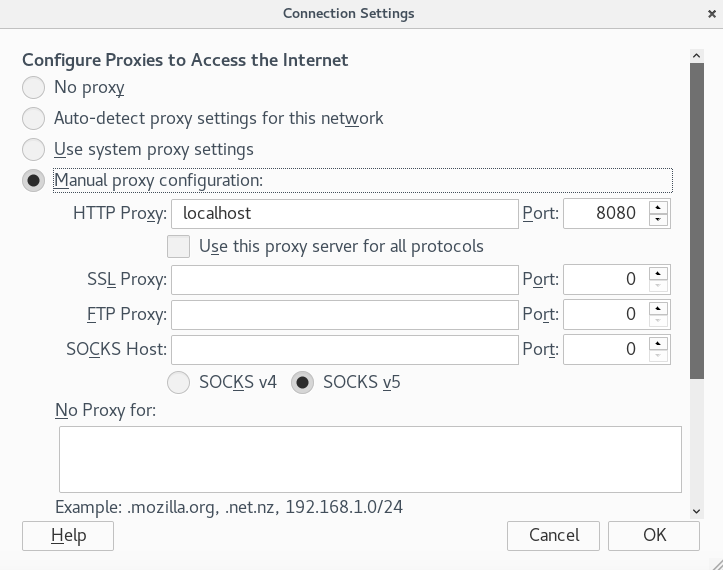
Therefore, you have to configure your browser’s settings to match the proxy configuration. In this tutorial I will be using Firefox. In Firefox, click on the Open Menu icon at the top right > Select Preferences > Select Advanced > Select Network > Click on the Settings button > Select Manual proxy configuration. For the field HTTP Proxy enter “localhost” and for the field Port enter “8080”. Then click the OK button.
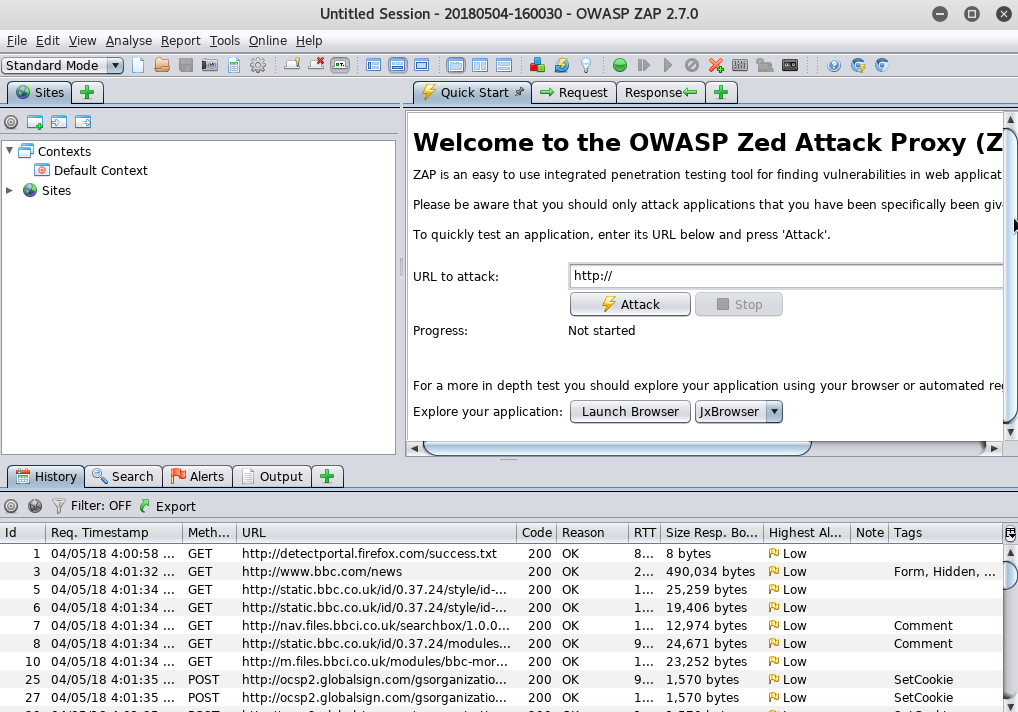
Now, if you try to go to an HTTP website such as http://www.bbc.com/, ZAP will automatically record the traffic in the History window as shown in the figure below.
However, if you try to visit an HTTPS website such as https://www.google.com, you’ll probably get hit with an annoying SSL Security Exception error stating that your connection is not trusted. This leads us to our next and final section.
Add a ZAP Root CA to Browser Certificates
In ZAP, go to Tools > Options > Dynamic SSL Certificates > Click on the Generate button if you don’t see a certificate > Click Save.
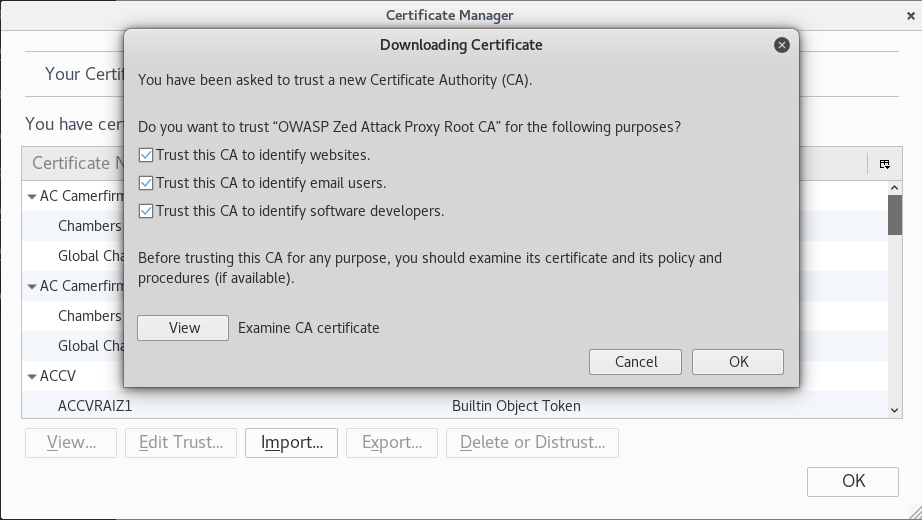
Next, navigate to Firefox browser > Click on the Open Menu icon at the top right > Select Preferences > Select Advanced > Select Certificates > Click on View Certificates > Under the Authorities tab click on Import > Navigate to the location you saved your certificate > Check all the trust boxes and click OK.
Now that the certificate is imported, try to revisit https://www.google.com. The SSL Security Exception Error should no longer be there.
This concludes the tutorial.