Vega Tutorial - How to Set Up Vega to Work with Browser
This blog is written in the form of a tutorial on how to intercept a browser’s traffic using the Vega proxy.
The topics covered are:
- Overview of Vega
- Configure Vega as proxy
- Add a Vega Root CA to the list of certificates in browser
Prerequisite tasks: Download and install Vega. In this tutorial we will be using Kali with the latest version of Vega (version 1.0 build id: devel-130).
Overview of Vega
Vega is an open-source cross-platform tool that is developed by an open-source security company called Subgraph. It is used as a penetration testing tool to find vulnerabilities in web applications. Vega contains several important features that will come up during this tutorial and future tutorials. The main features include:
-
Intercepting Proxy: Vega sits as an intercepting proxy between the browser and the application and therefore captures all the requests and responses sent. The proxy can also be configured to pass and analyze proxy traffic through scanner modules.
-
Automated Scanner: The scanner crawls the application, analyzes page content for input parameters and attempts to find vulnerabilities by performing attacks on the application.
This tutorial will only focus on the first feature. As an intercepting proxy, Vega will sit in between the browser and the web application as shown in the figure below.

Any request sent by the browser will first be intercepted by Vega and then sent to the web application. Similarly, any response sent by the web application will be intercepted by Vega and then sent to the browser. When a request is intercepted, Vega can modify the request to exploit an existing vulnerability in the web application.
Configure Vega as proxy
In order for Vega to work as an intercepting proxy, you need to configure the network settings of your browser. By default, Vega is configured to listen on port 8888 on localhost (127.0.0.1). This can be seen in the Preferences window (Window > Preferences > Proxy > Listener).
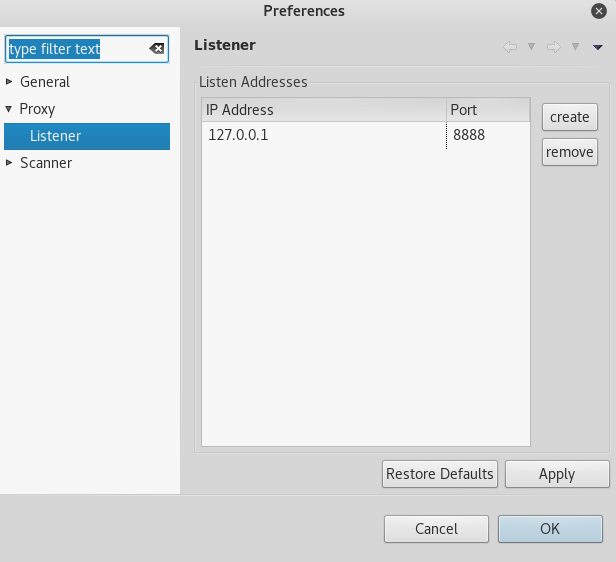
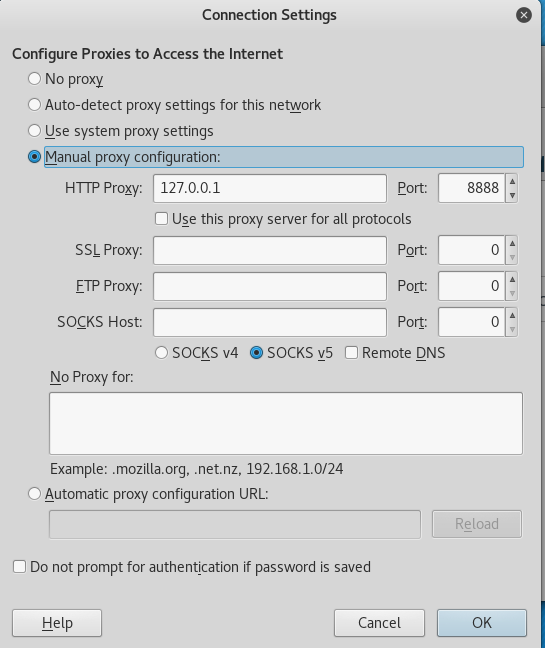
Therefore, you have to configure your browser’s settings to match the proxy configuration. In this tutorial we will be using Firefox. In Firefox, click on the Open Menu icon at the top right > Select Preferences > Select Advanced > Select Network > Click on the Settings button > Select Manual proxy configuration. For the field HTTP Proxy enter “127.0.0.1” and for the field Port enter “8888”. Then click the OK button.
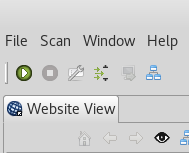
Next, you need to turn the proxy on from the Vega GUI. This can be done by clicking on the top left green arrow. To stop the proxy, you click on the corresponding red square (visible when the proxy is on).
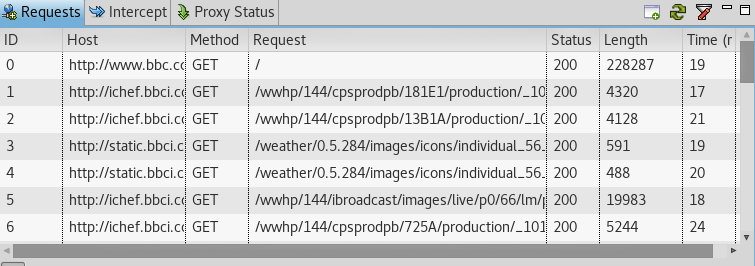
Now, if you try to go to an HTTP website such as http://www.bbc.com/, Vega will automatically record the traffic in the Requests window as shown in the figure below.
However, if you try to visit an HTTPS website such as https://www.google.com, you’ll probably get hit with an annoying SSL Security Exception error stating that your connection is not trusted. This leads us to our next and final section.
Add a Vega Root CA to Browser Certificates
In order to set up a Vega Root CA in your Firefox browser, visit the hard-coded url http://vega/ca.crt. This will prompt you with the following Downloading Certificate window. Check all the boxes and click OK.
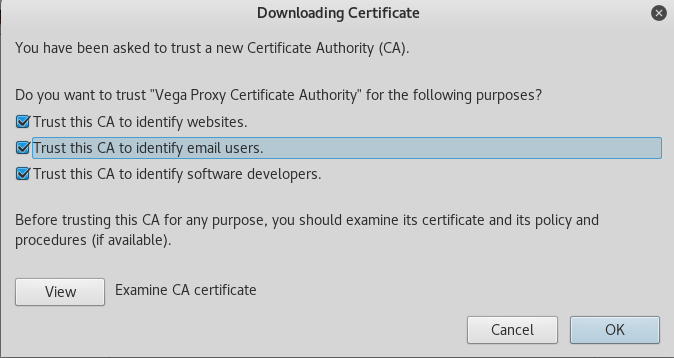
Now that the certificate is imported, try to revisit https://www.google.com. The SSL Security Exception Error should no longer be there.
This concludes the tutorial.