PostgreSQL Beginner Tutorial I: Getting Started with pgAdmin 4
This blog is written in the form of a tutorial on how to use PostgreSQL using the pgAdmin 4 graphical user interface. It will be one of many tutorials that I will write to cover some of the lab material that I will be teaching this semester.
The topics covered are:
- Brief overview of PostgreSQL and pgAdmin
- Get started with pgAdmin 4
- Create your first database
- Add tables to the database
- Add data to the tables you created
- Create queries using the Scripts option
Prerequisite tasks: Install PostgreSQL 10 and pgAdmin 4 on your computer.
Overview of PostgreSQL and pgAdmin
PostgreSQL is an open source object-relational database management system (ORDBMS) that runs on all major operating systems, including but not limited to, Linux, macOS and Windows. As a database server its main functionality is to store data securely and return and retrieve data upon request from other software applications. PostgreSQL can be used either through a GUI or using the command line. In this tutorial we’ll be working with PostgreSQL using a GUI called pgAdmin, which is an open source software that is used to connect to and manage PostgreSQL databases.
Get Started
Once you have PostgreSQL 10 and pgAdmin 4 installed (there are many online resource on how to do that), you will need to connect to a PostgreSQL server on pgAdmin. In our case, we will be connecting to localhost as a server.
To connect to the server, right click on PostgreSQL 10, then select Connect Server.
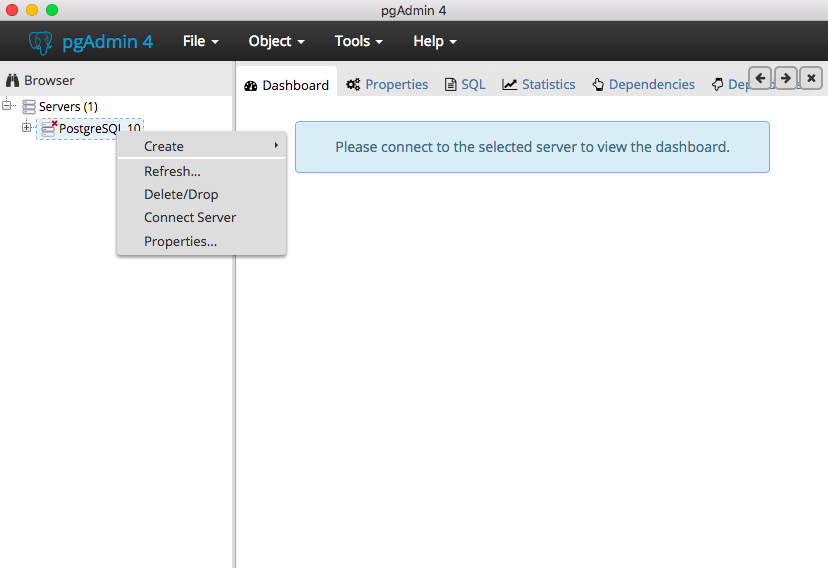
This will prompt you for a password. The password to be entered will depend on whether a password was set up during installation.
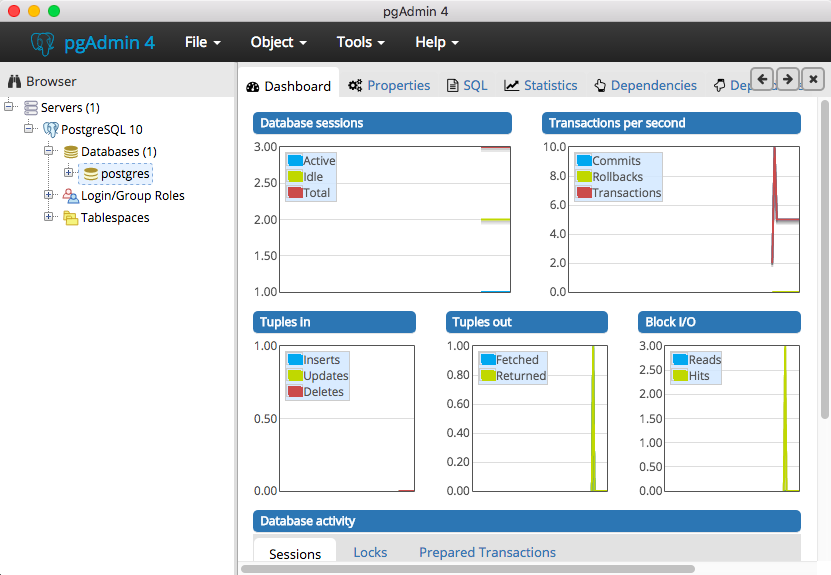
After entering the password, you will see the server connected in the Browser section on the left hand side of the interface (the left side is known as the tree control). For first time users, a default database will be created called postgres as shown in the image below.
Create First Database
To create a new database, right click on Databases in the tree control > click on Create > and then select Database.
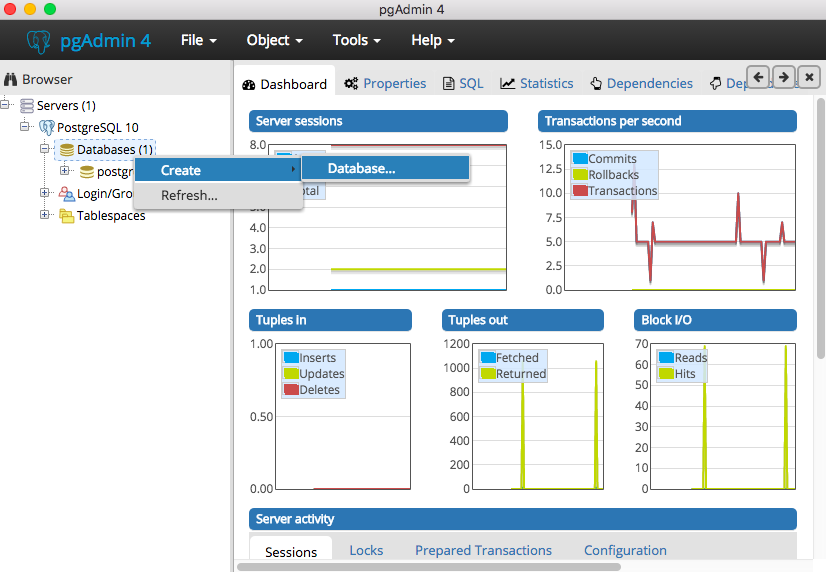
This will prompt you with a Create-Database window. In the Database field, enter the desired name of your database. In this tutorial, I will choose the database name to be tutorial1. Then click the Save button to create your new database. As mentioned earlier, the newly added database can be seen on the tree control under Databases.
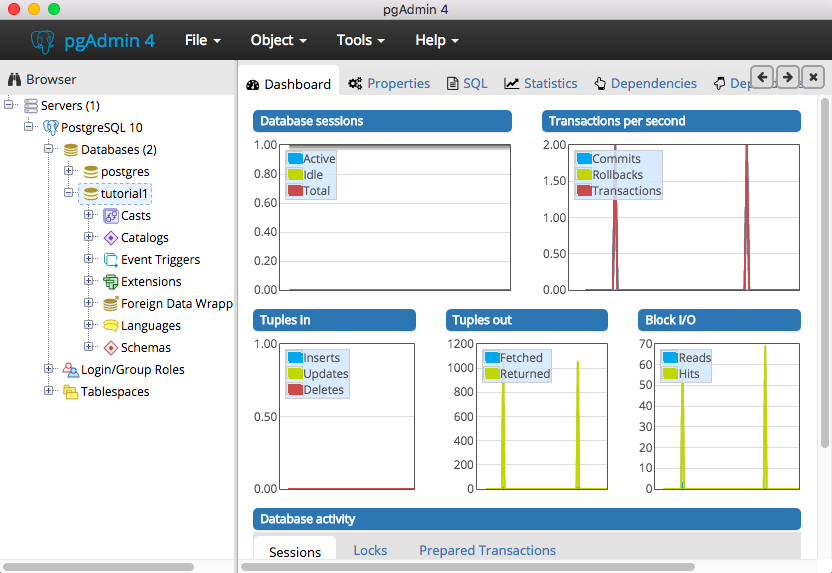
For the rest of this blog, I will be working with our tutorial1 database.
Add Tables to Database
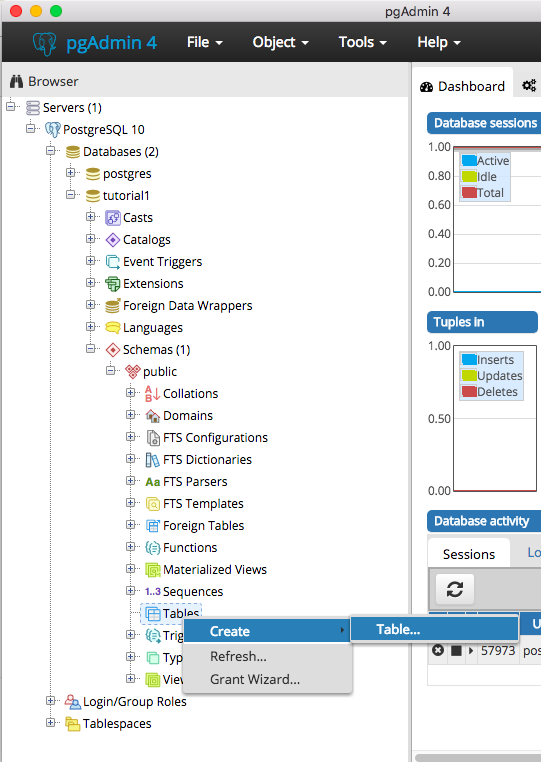
To add a table to tutorial1 database using the GUI, expand the object Schemas in the tree control > expand public > right click on Tables > click Create > and then select Table.
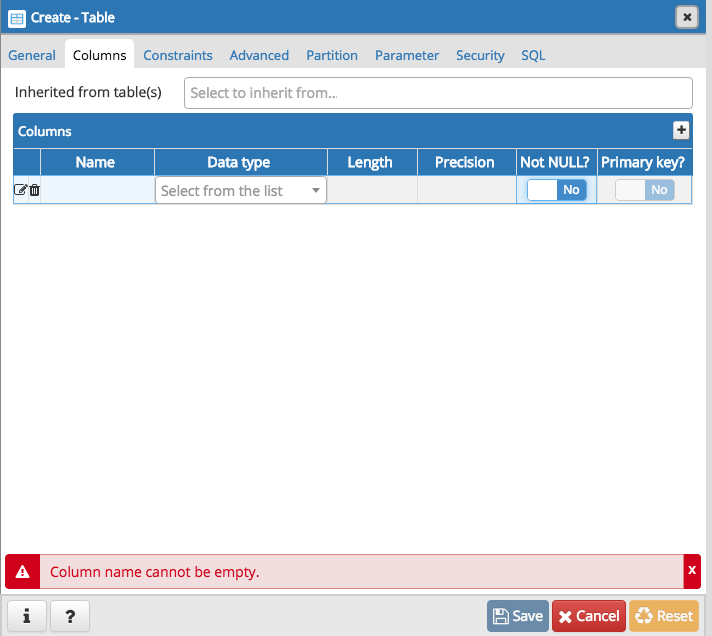
This will prompt you with a Create-Table window. Under the General tab in the Name field, enter the desired name of your table. In this tutorial, I will choose the table name to be persons. To add fields (column names) to the table click on the Columns tab, then click on the “+” button at the top right. This will provide you a space to enter a new column.
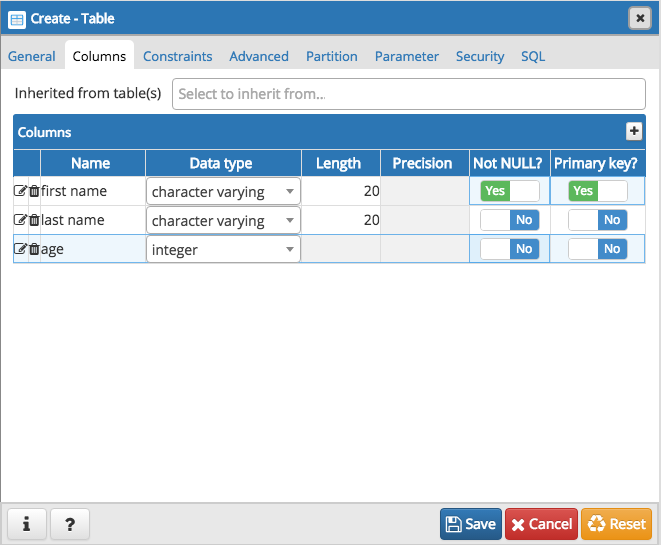
The first column I want to add has a Name of “first name” with Data type “character varying” (which means character with a specified length) and Length of “20”. I will also set this column to be not null and a primary key. This can be done by clicking on No in the Not NULL? and Primary key? columns. Similarly, I will add columns “last name” and “age” with data types “character varying” and “integer”.
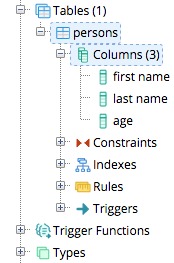
Click on the Save button to create your new table. The newly added table can be seen on the tree control under tutorial1 > Schemas > public > Tables. To view the columns we just created, expand the persons table by clicking on the + sign, then expand Columns.
Add Data to Table
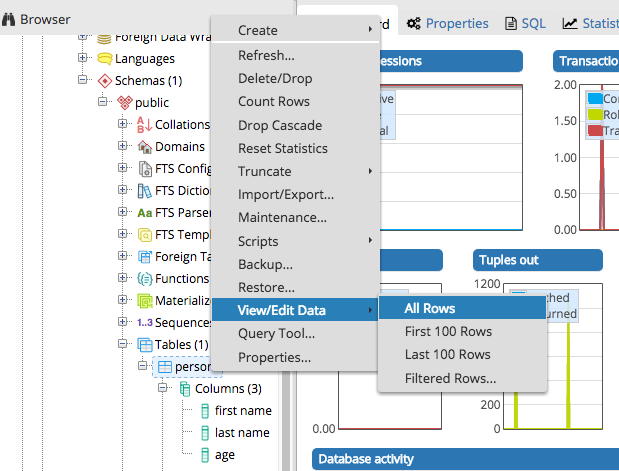
Now the we have created a persons table, it is time to add data to the table. In order to do that, right click on persons in the tree control > click on View / Edit Data > select All Rows.
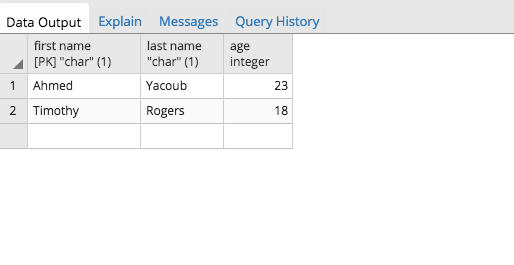
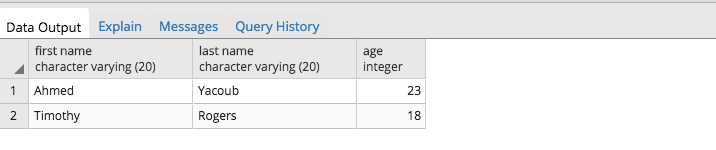
This will open up a new panel called “Edit Data”. At the bottom of the panel, in the Data Output tab, click on the empty row underneath your column titles and enter the desired data in the table. For this tutorial, I will have two users, Ahmed Yacoub and Timothy Rogers, with ages, 23 and 18.
Create Queries Using the Scripts Option
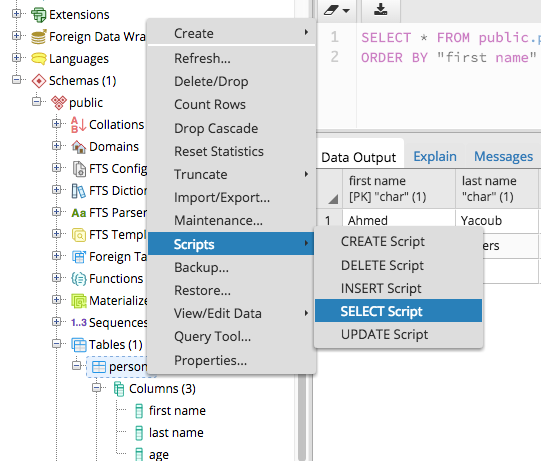
To perform a query using the Scripts option, right click on the table you want to query. In our case that would be the persons table > select Scripts > then click on the desired query. In our case that would be the SELECT Script.
A SELECT script will automatically be generated on the table in question. What this script is doing is outputting every first name, last name and age in the table persons.
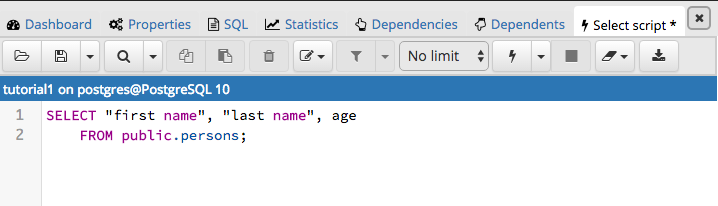
Since we included two individuals in our table, those should be outputted when we execute the query. To execute the query click on the Execute/Refresh button at the top of the tab (represented using a lightning sign). The following is the output you should see.
This concludes our tutorial. The next tutorial will cover the basics of SQL programming.
References:
- https://en.wikipedia.org/wiki/PostgreSQL